From Vision to Execution (Part 2: Construction)
Posted in Insights -
Have you ever wondered what goes into the making of a water feature? Delivering a beautiful fountain, cascading waterfall, reflecting pool, or other water feature is a multi-layered process that is part art and part science.
In this three-part series, OTL will describe the creation of our water features from start to finish. In Part 1, we discussed the intricacies of our design process. Part 2, below, focuses on how our water features are constructed, and Part 3 will describe how we bring each water feature to life.
Part 2: Behind the Scenes: Constructing a World-Class Water Feature
By Chris Roy, Director of Creative Design
As outlined in Part 1 of our three-part series, building a water feature begins with an exceptional design that articulates each stakeholder’s vision and addresses site parameters.
Next is construction – a multi-faceted process that can vary widely depending on the design.
OTL’s expertise spans a wide variety of project types, from show fountains to architectural fountains, rockwork to waterfalls, and many other intricate water features and themed environments.
There are several key principles that apply to the construction of every OTL project, including safety, planning, schedule, and attention to detail – all of which must be carried out through the entire process.
Building on these fundamentals, OTL then takes a tailored approach to each project, delivering a construction process that, while intricate and complex, feels seamless to project owners and developers.
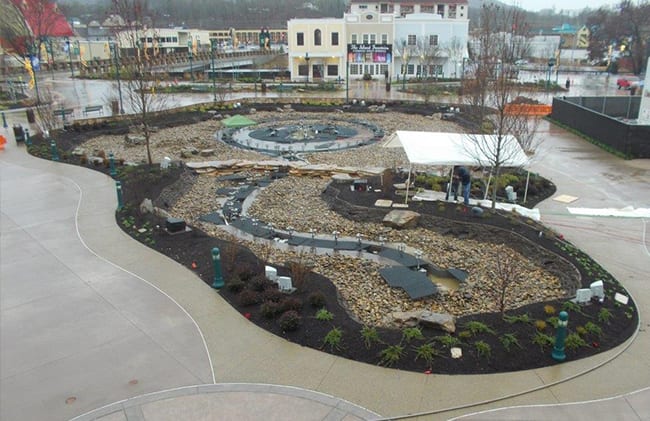
The below pictorial illustrates the construction process for a show fountain OTL recently designed and constructed.
Throughout the process, we help our clients more deeply understand the highly involved construction phase of building a water feature, and ensure they are able to see how each step contributes to the overall functionality and exceptional quality of their development project.
Building a Show Fountain the OTL Way
A brief overview of the steps involved in building a world-class Show Fountain
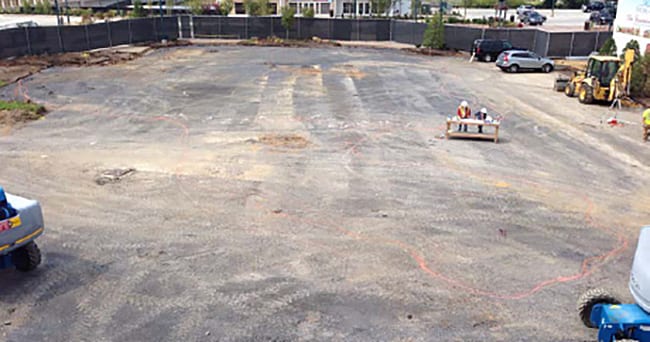

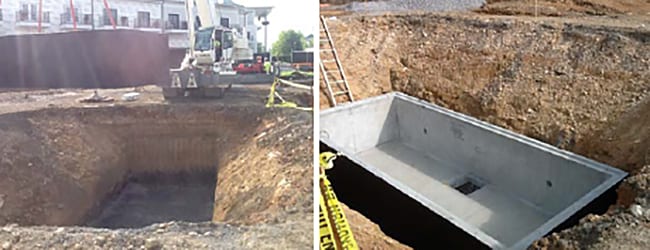
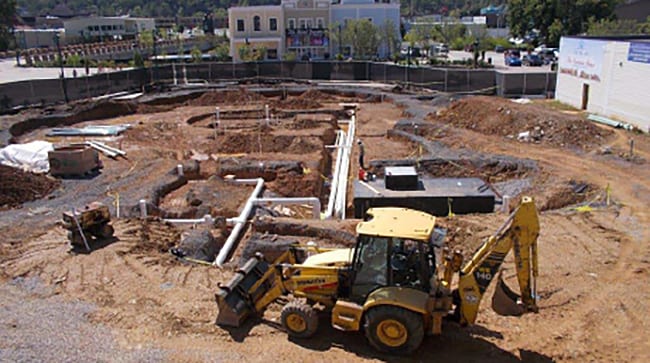
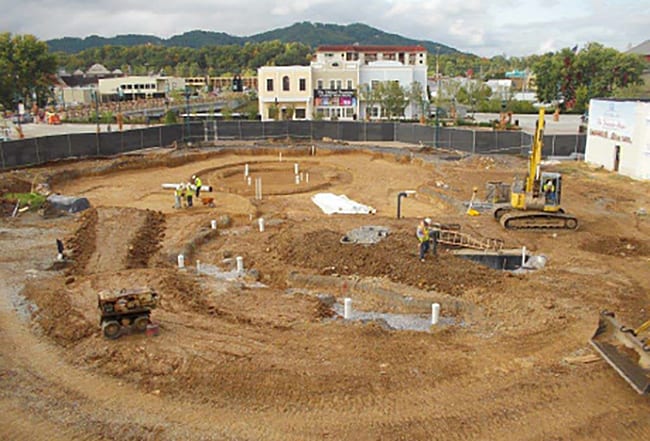
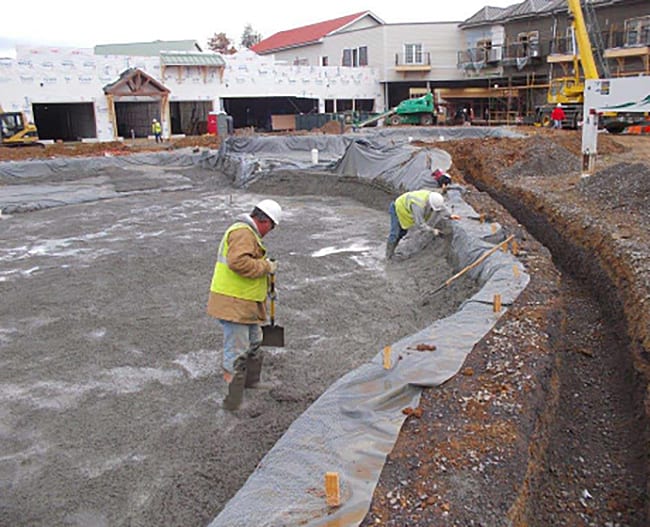
ABOVE: After surveying and laying out the fountain footprint, our crews begin installing the vault – the largest and deepest excavation item in our scope.

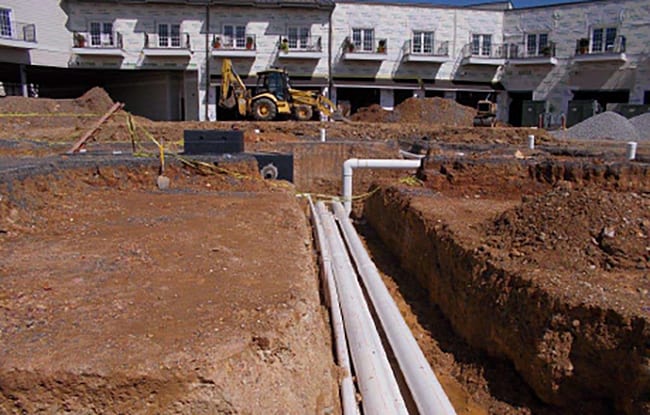
ABOVE: With the vault set, our crews begin trenching for and installing the suction drainage system, which is generally composed of the largest plumbing piping in the project – and buried the deepest.
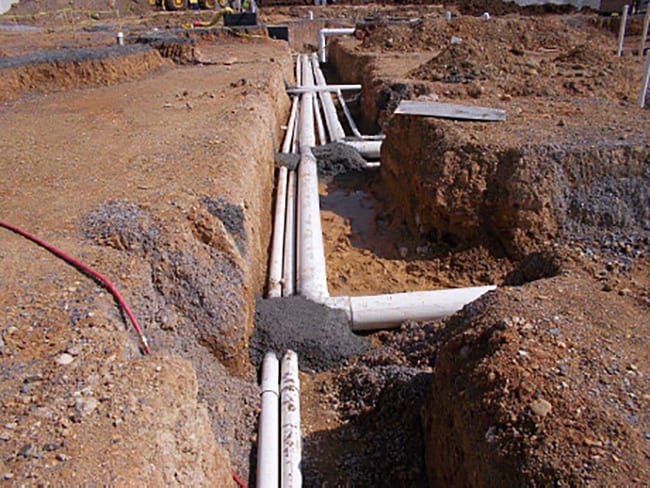
ABOVE: Rough plumbing proceeds with the installation of skimmer suction lines and filter returns, as well as display piping for the project’s waterfall. All lines are secured with thrust blocks before backfilling.
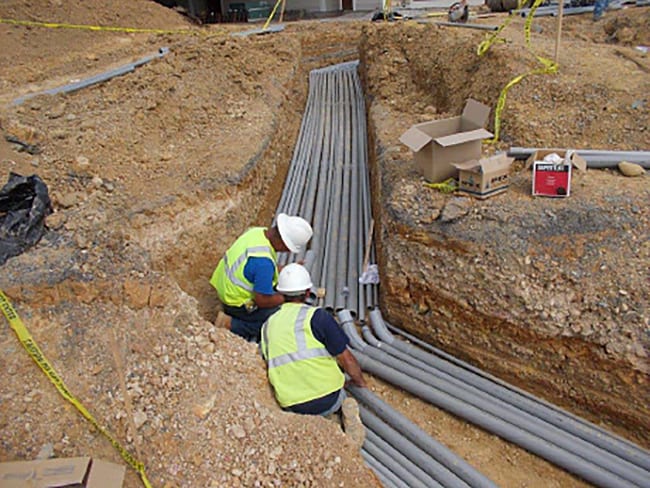
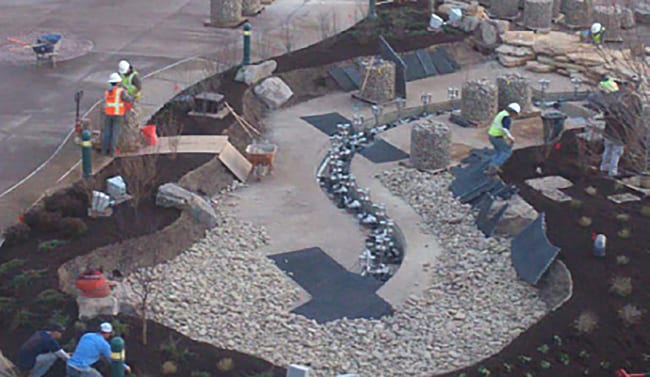
ABOVE: With rough plumbing installed and major backfilling completed, the fountain is starting to take shape. Our electricians begin installing conduit – and for a show fountain, there is a lot of it!
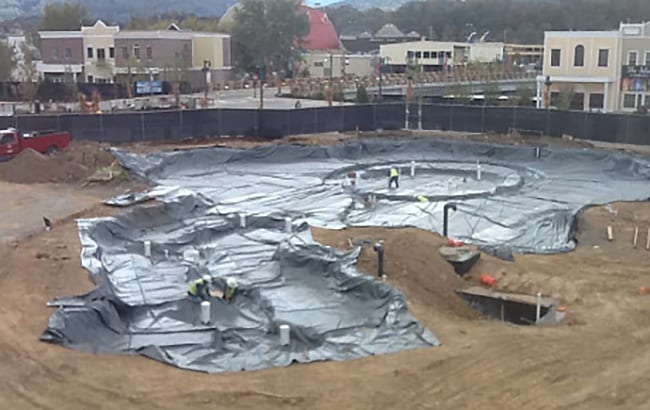
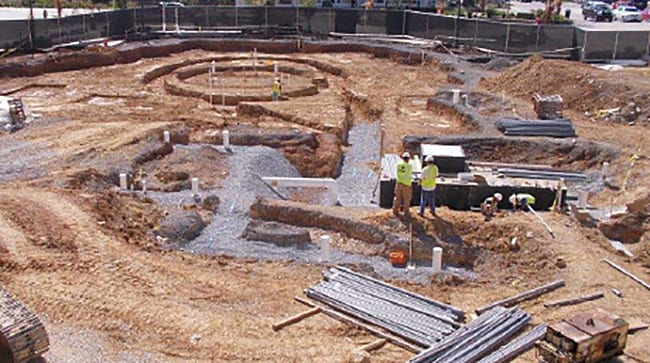
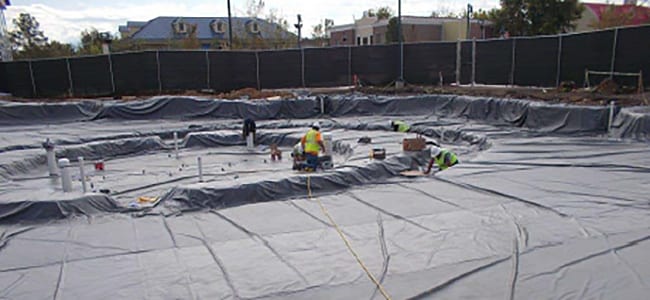
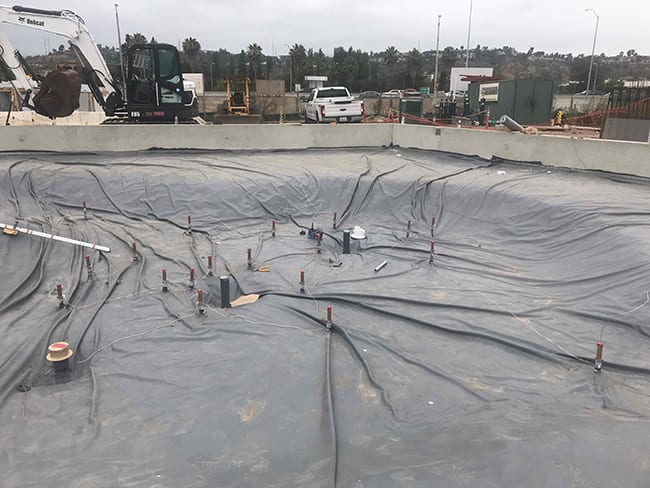
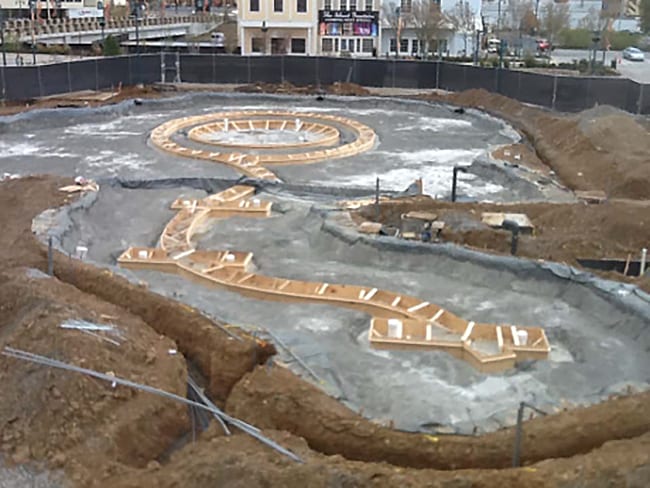
ABOVE: After completion of rough plumbing and rough electrical, our crews complete fine-grading of the pond floor, then begin installing the PVC liner membrane, which makes the pond water-tight.
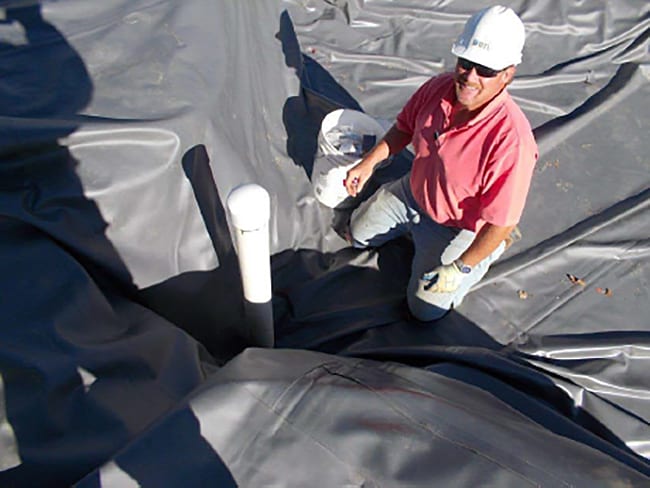
ABOVE: There are two elements that set the basin construction of a show fountain apart from more typical pond construction:
- Bottom contouring to allow for future equipment placement (top)
- The installation of waterproofing boots around far more penetrations than would be found in a typical pond (bottom). The penetrations in OTL’s show fountains typically number in the hundreds, and it is imperative that each one is installed carefully to ensure that the fountain doesn’t leak.
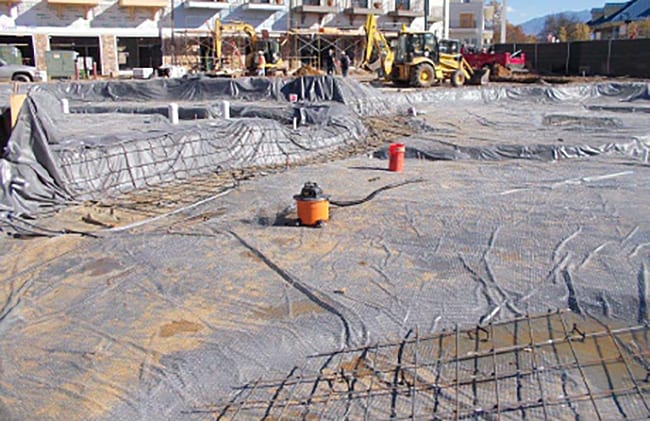
ABOVE: With the liner installed and all joints sealed, the surface is covered with reinforcing mesh and rebar, preparing for concrete to be poured. All metallic items are bonded as per National Electrical Code (NEC) regulations.
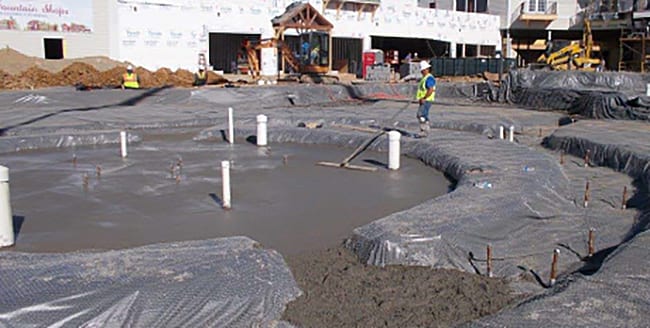
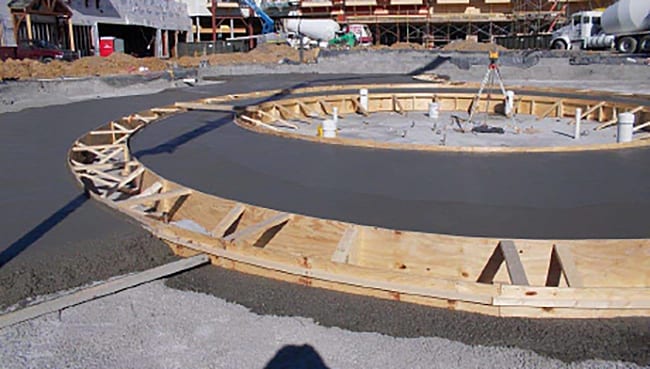
ABOVE: We place and screed the concrete to form the equipment pit floors. Then, a 3- to 4-inch layer is spread across the pond floor and up the sloped sides as a finish material and protection for the liner.

ABOVE: After the base concrete is cured, our crews install formwork around the jet troughs and equipment pits. The formwork includes a ledge to support the grating that will cover the troughs.
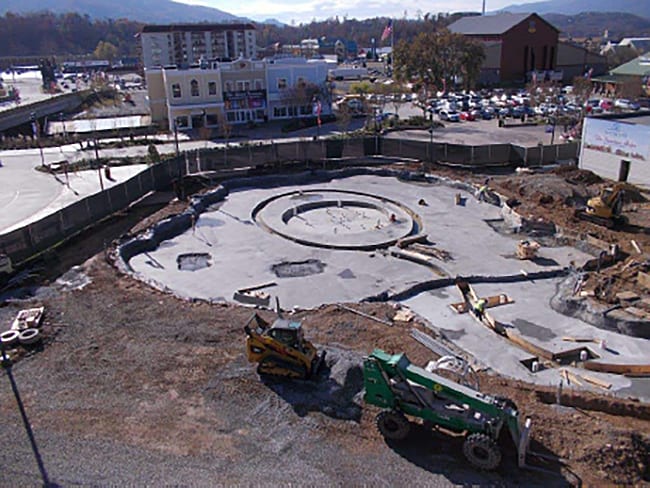
ABOVE: Concrete is placed around the jet trough forms, creating a clean, professional basin floor. The depressed areas shown contain additional reinforcing to support large submerged boulders.
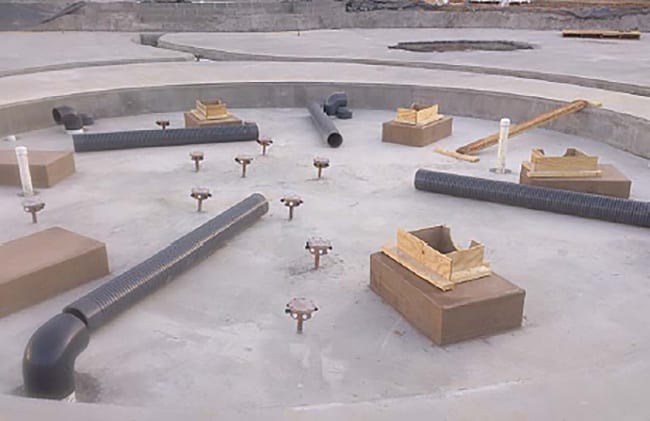

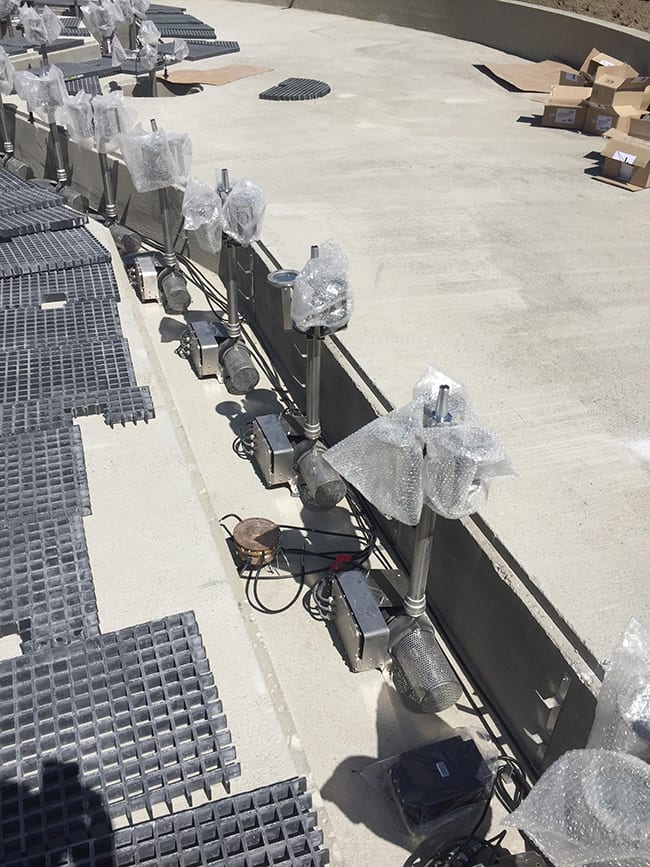
ABOVE: Housekeeping pads for elevated equipment such as robotic nozzles are formed and poured, and installation of show fountain equipment commences.
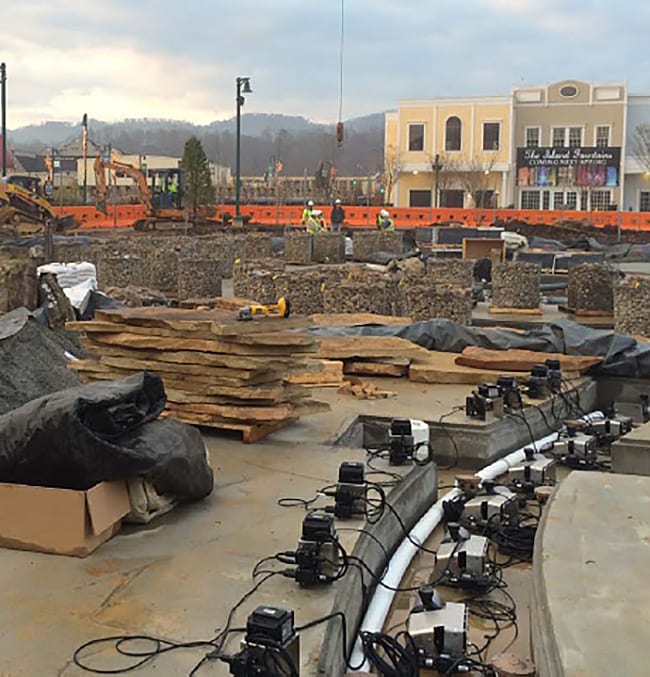
ABOVE: Fountain equipment is installed and wired in the troughs, while cobble for the basin floor and rock slabs for the waterfall are stockpiled, awaiting installation.
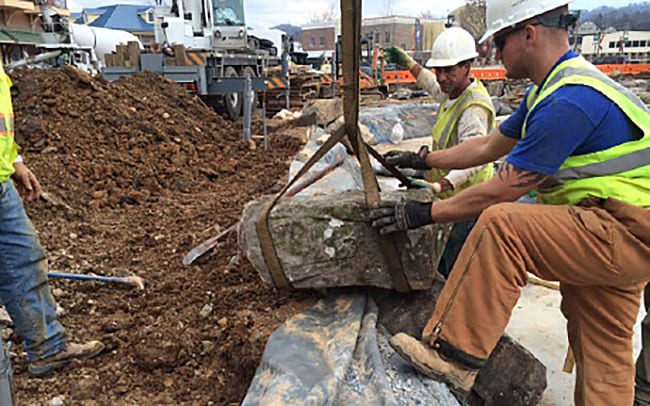
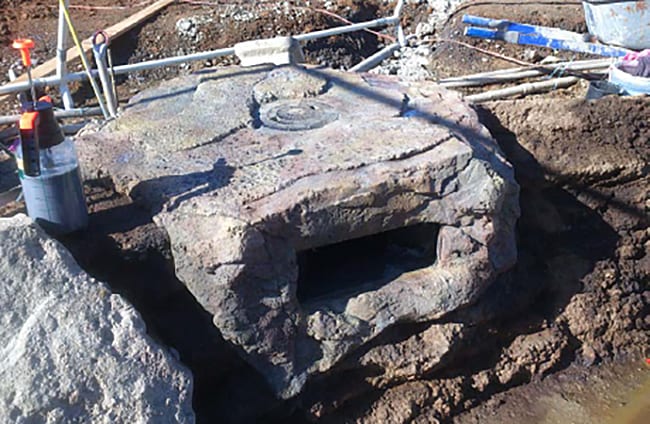
ABOVE: Boulders are placed around the perimeter and within the pond. OTL’s artificial rockwork artisans create artificial boulders to hide skimmers, and finish exposed pond edges with a faux mud bank.
ABOVE: Installation of the cobble is nearing completion, and equipment installation in the trough is complete, including nozzles and lights. All fountain equipment is thoroughly tested before the fountain is filled.
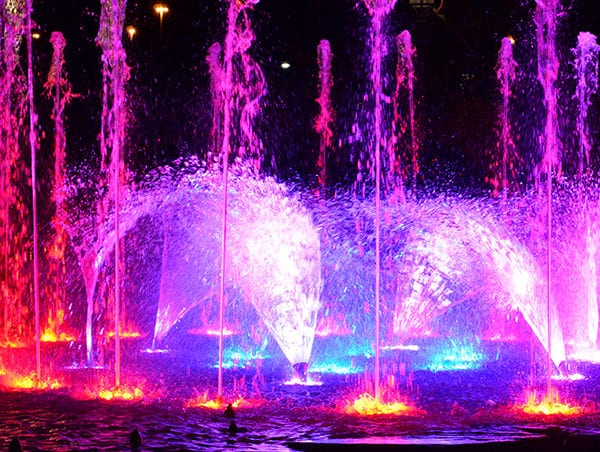
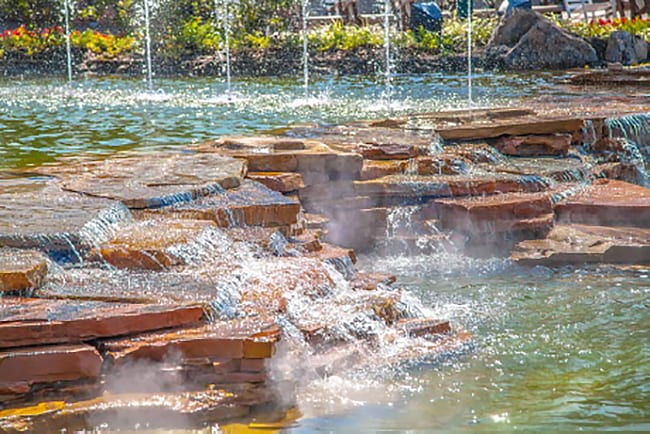
ABOVE: Once everything checks out, the pond is filled and the system started up.
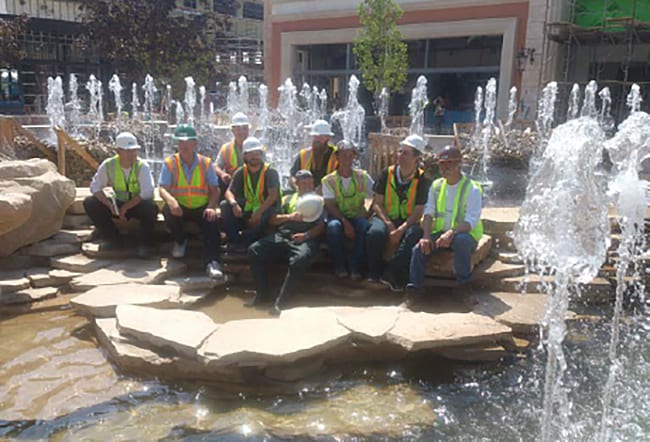
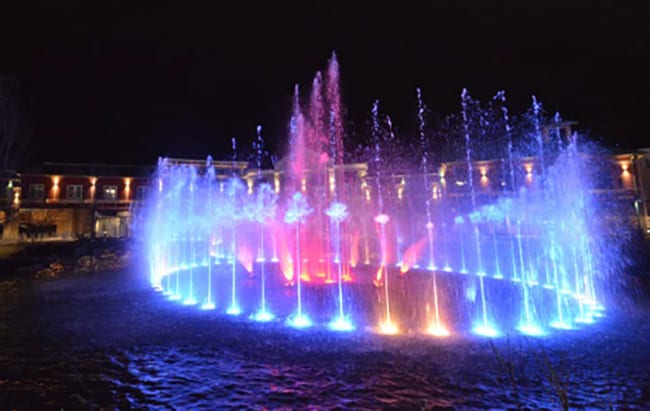
ABOVE: With everything complete, it’s Showtime!
Stay tuned for Part 3 in our three-part series “From Vision to Execution,” which explores the final phase of building a water feature: bringing the project to life.
Featured Articles
- Team Spotlight: Getting to Know Chip Beyt, Strategic Partnerships
- Merging Environments: Continuing to Explore the Indoor-Outdoor Experience in Hospitality
- Why the Best Design Partnerships Start with Business Goals, Not Projects
- Experience is the New Amenity: 5 Trends Development Teams Should Watch
- “Green” Two Ways: How Sustainable Design Cuts Costs and Waste